Red White and Blue Poke Cake
Our red white and blue poke cake is made with Jell-O and cream cheese topping. It’s an easy dessert for July 4th, Memorial Day, or potlucks.

Would you like to save this recipe?
Easy Red White and Blue Poke Cake
This red white and blue poke cake is one of my go-to desserts for summer. It’s great for the 4th of July, Memorial Day, or any kind of get-together.
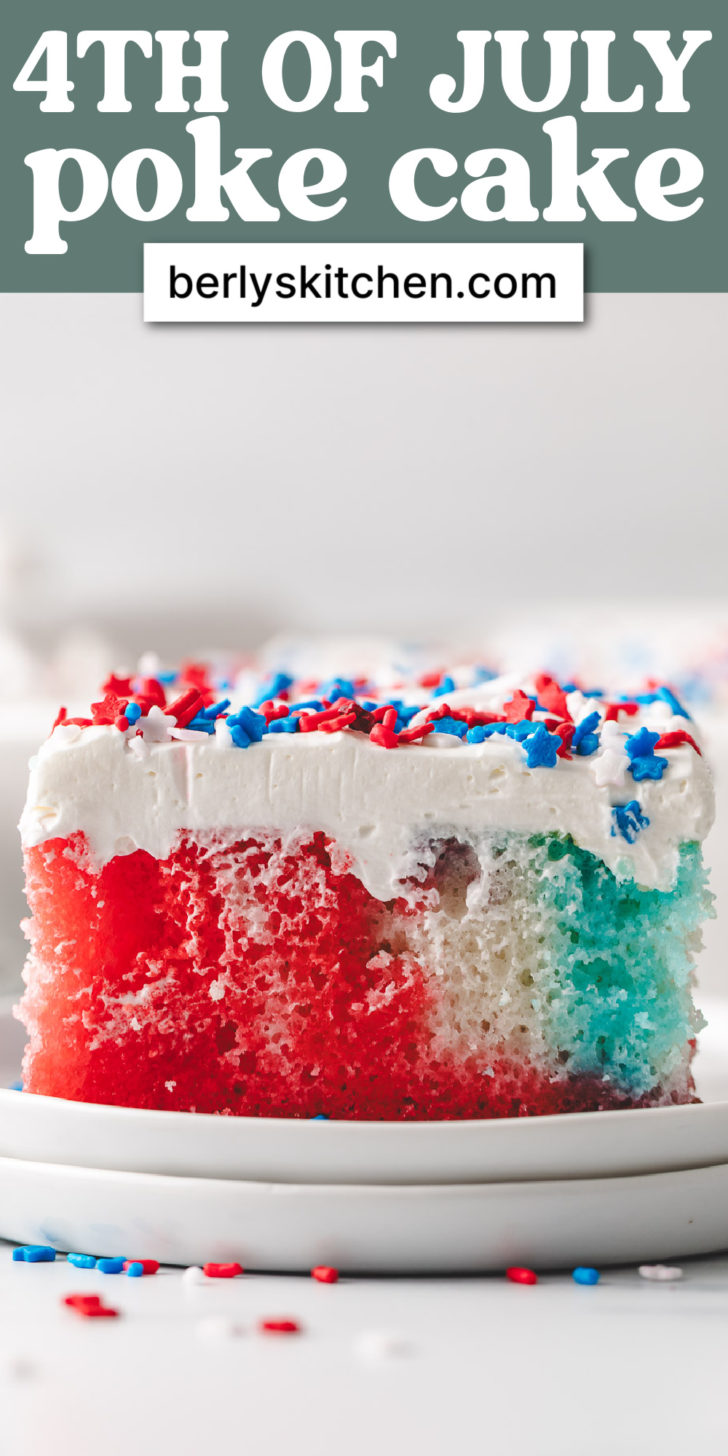
The red and blue Jell-O adds a really pretty color, and the cream cheese topping gives it creamy layer that everybody loves.
It’s so easy to make, too! You start with a white cake mix, poke holes all over the top, and pour the gelatin in so it soaks into the cake. Once it’s chilled and topped, it slices up beautifully.
John has a major sweet tooth, and this one’s right up his alley. He’s big on vintage desserts like this one that you’d find in old community cookbooks or on the back of a flour bag or cake mix package.
This recipe reminds me of something you’d bring to a church potluck, family reunion, or summer luncheon. It’s easy, colorful, and always disappears fast.

Tips for Making a Jell-o Poke Cake
Use the handle of a wooden spoon. It makes the perfect size holes for the Jell-o to soak into. A skewer or thick straw works too, but the holes may not be big enough.
Pour the Jell-o slowly. Use a spoon or measuring cup to help control where the liquid goes. I like to alternate red and blue in different spots, but you can do it however you like.
Chill before topping. Make sure the Jell-O layer is fully set before adding the cream cheese topping. Give it at least 2 hours in the fridge.
Wait to add the sprinkles. If you’re using sprinkles, add them right before serving so the color doesn’t bleed into the topping.

Make It Look Like a Flag
If you want to dress it up a little, you can use fresh fruit to turn the top of the cake into a flag. Just spread on the cream cheese layer, then add blueberries in the top left corner and lay sliced strawberries across it in rows. It’s simple but looks really cute once it’s done.
If you’re taking this to a potluck, luncheon, or work event, wait to add the fruit until you’re ready to serve. That keeps the topping from getting runny and keeps the fruit looking fresh.
How to Store Leftovers
Cover any leftover poke cake tightly and store it in the fridge. The cake stays good for about 4 days. You can also make it a day ahead if you’re planning to bring it somewhere. Just wait to add the sprinkles or fruit topping until it’s time to serve.

More Dessert Recipes
Like This Recipe?
We’d love it if you would leave a 5 Star ⭐️⭐️⭐️⭐️⭐️ rating below.

Ingredients
For the Cake:
- 14.25 ounce box white cake mix
- ¾ cup water
- ½ cup vegetable oil
- 4 large egg whites
For the Gelatin:
- 3 ounces strawberry gelatin, or cherry gelatin (1 box)
- 3 ounces berry blue gelatin, (1 box)
- 2 cups boiling water, divided
- 1 cup cold water, divided
For the Topping:
- 8 ounces block-style cream cheese, softened
- 8 ounces tub whipped topping, (like Cool Whip) thawed
- 1 cup powdered sugar
- Red, white, and blue sprinkles
Instructions
To Make the Cake:
- Bake the cake in a 9×13-inch pan according to the package directions. Let the cake cool for 20 minutes.14.25 ounce box white cake mix¾ cup water½ cup vegetable oil4 large egg whites
- Poke holes all over the cooled cake using the handle of a wooden spoon. Space them about 1 inch apart.
To Make the Gelatin:
- In one bowl, mix the red gelatin with 1 cup boiling water, then stir in ½ cup cold water until dissolved.3 ounces strawberry gelatin
- In a second bowl, repeat the process with the blue gelatin.3 ounces berry blue gelatin
- Carefully pour the gelatin over the cake, alternating red and blue in different areas.
- Chill the cake for at least 2 hours or until the gelatin is set.
To Make the Topping:
- In a large bowl, beat the cream cheese until smooth. Add the whipped topping and powdered sugar and mix until combined.8 ounces block-style cream cheese1 cup powdered sugar8 ounces tub whipped topping
- Spread the topping evenly over the chilled cake. Add sprinkles just before serving.Red, white, and blue sprinkles
Suggested Equipment
Notes
Nutrition
Meet Kimberly
Hi, I’m Kimberly Vargo! Comfort food is at the heart of everything I make like easy dinners and sides to desserts, cocktails, and condiments. A lot of my inspiration comes from old family recipes, personal favorites, and vintage cookbooks.
