Vanilla Wafer Crust
This easy vanilla wafer crust recipe fits a 9×13-inch pan and works for both no-bake and baked desserts. It only has 4 ingredients!

Easy Recipe for Vanilla Wafer Crust
This vanilla wafer crust recipe is one of my favorites to use for no-bake desserts! It’s the one I used for my banana split bars because vanilla wafers and banana go so well together.
It’s also fantastic for banana pudding bars, no-bake cheesecake, or key lime bars (yum!).
Sometimes I’ll swap out the graham cracker crust on our no-bake cherry cheesecake and use this crust instead. It’s so good!
My vanilla wafer crust is so easy to make! All you need is a box of vanilla wafers, some sugar, a teeny tiny bit of salt, and a little more than a stick of butter. That’s it!

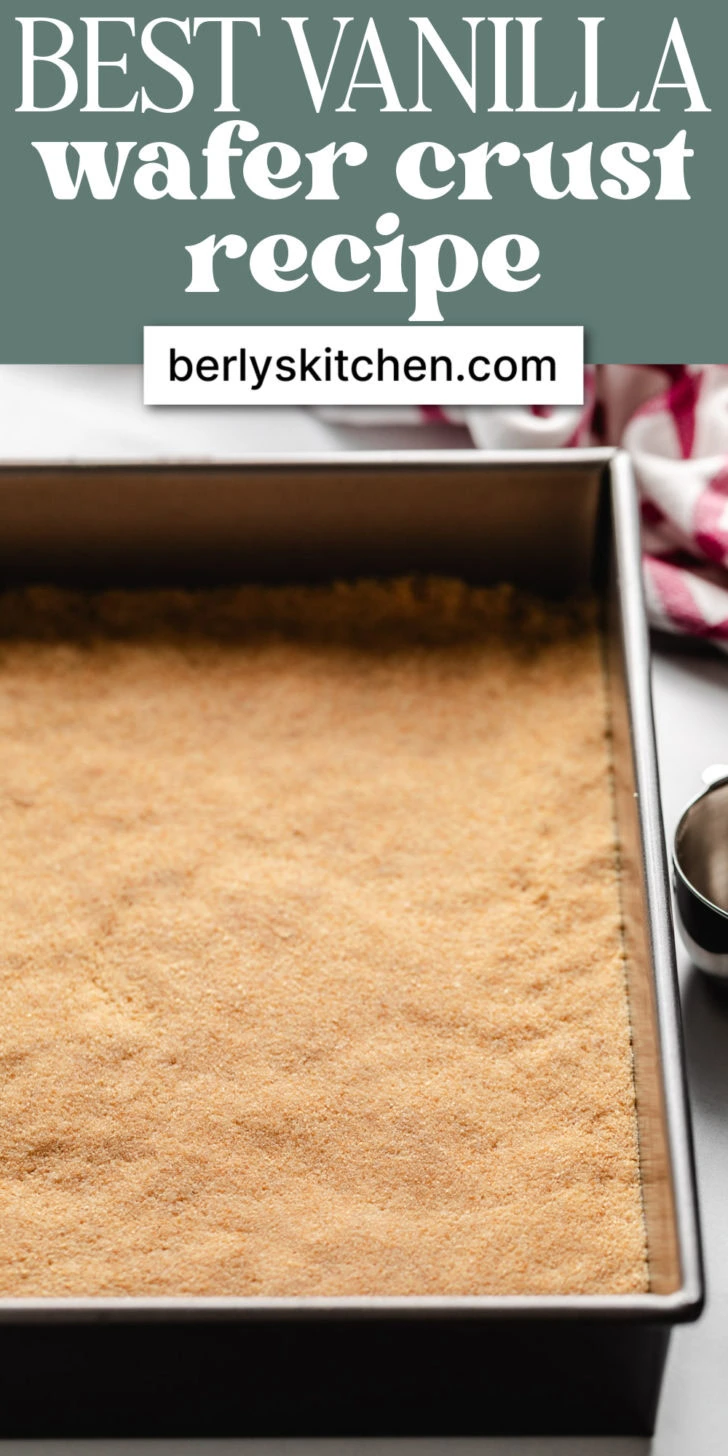
How to Make a Vanilla Wafer Crust in a 9×13-Inch Pan
Start by crushing the vanilla wafers into fine crumbs. I usually pulse them in a food processor with sugar and salt until they look like sand.

Then pour in the melted butter while the processor runs.

Once everything is evenly mixed, press the crumb mixture into the bottom of a greased 9×13-inch baking dish. You’ll want to really press it in. Use more pressure than you’d use for a graham cracker crust.

I usually use the bottom of a measuring cup or a ramekin to help press it firmly and evenly. After that, pop the pan in the fridge while you prep the filling.
How to Bake This Crust
If you’re baking the crust, preheat the oven to 350°F. Prep the crust just like the no-bake version: crush the wafers, mix in the sugar and salt, then add melted butter and stir or pulse until combined.
Press the mixture into a greased 9×13-inch baking dish and bake it for about 9–11 minutes. The edges should just start to turn golden brown. Let the crust cool completely before adding your filling.

Tips for Success
- Press firmly. The tighter the crumbs are packed, the better your crust will hold its shape.
- Chill well. The longer you allow the crust to cool in the fridge, the better it will hold together.
Do I need a food processor to make this crust?
Nope! You can crush the wafers using a zip-top bag and rolling pin. Just make sure the crumbs are really fine so the crust holds together well.
Can I use store-brand vanilla wafers?
Yes, absolutely! I used off-brand (Great Value/Wal-Mart brand). Nilla Wafers are really popular and will definitely work.

How to Store This Crust
If you’re not filling the crust right away, keep it covered in the fridge for up to 2 days. If the dessert has already been assembled, follow the storage instructions for the full recipe (especially for no-bake or cream-based fillings).
More Dessert Recipes
Like This Recipe?
We’d love it if you would leave a 5 Star ⭐️⭐️⭐️⭐️⭐️ rating below.

Ingredients
- 11 ounce box vanilla wafers, (about 3 cups crushed)
- ⅓ cup granulated sugar
- Pinch of salt
- 10 tablespoons unsalted butter, melted (1 standard stick + 2 tablespoons)
Instructions
For a No-Bake Dessert:
- Add the vanilla wafers, granulated sugar, and salt to a food processor. Pulse until fine crumbs form.11 ounce box vanilla wafers⅓ cup granulated sugarPinch of salt
- With the processor running, drizzle in the melted butter until the mixture is fully combined and looks like damp sand.10 tablespoons unsalted butter
- Press the mixture firmly into the bottom of a lightly greased 9×13-inch baking dish. Chill while preparing whatever filling you’re using.
For a Baked Crust:
- Preheat the oven to 350°F. Lightly spray a 9×13-inch baking dish cooking spray and set aside.
- Add the vanilla wafers, granulated sugar, and salt to a food processor. Pulse until fine crumbs form.11 ounce box vanilla wafers⅓ cup granulated sugarPinch of salt
- With the processor running, drizzle in the melted butter until the mixture is fully combined and looks like damp sand.11 ounce box vanilla wafers
- Press the mixture firmly into the bottom of the prepared baking dish.
- Bake for 9–11 minutes or until the edges are just starting to turn golden brown. Let the crust cool completely on a wire rack before filling.
Suggested Equipment
Notes
Nutrition
Meet Kimberly
Hi, I’m Kimberly Vargo! Comfort food is at the heart of everything I make like easy dinners and sides to desserts, cocktails, and condiments. A lot of my inspiration comes from old family recipes, personal favorites, and vintage cookbooks.
