
Soft Homemade Yeast Rolls

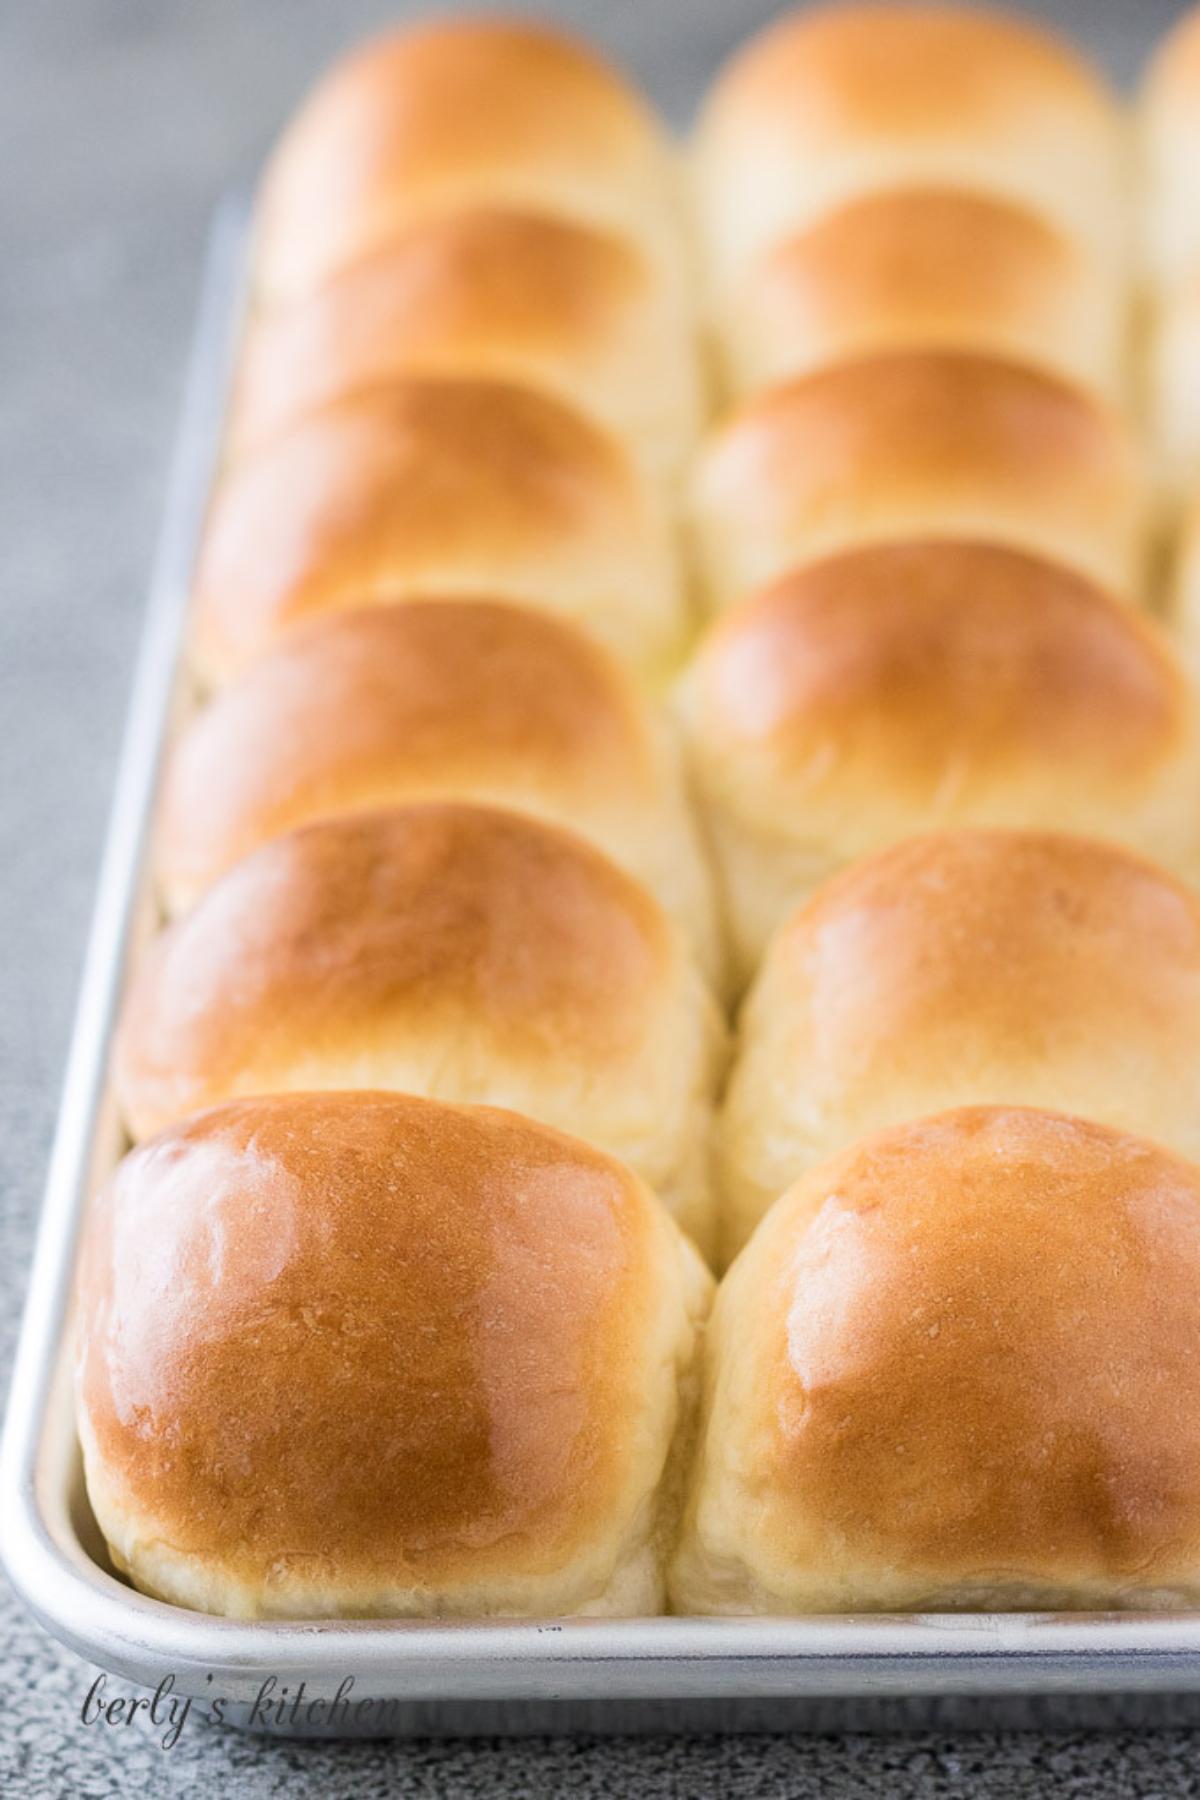
These homemade yeast rolls are soft and fluffy in the middle with golden brown tops brushed in melted butter. They’re exactly the kind of warm rolls that make restaurant bread baskets so hard to leave alone.
💌 Don't forget to save this recipe!
You don’t need to go out to dinner to get a good yeast roll, though. This recipe makes 24 smaller rolls that are great for holiday meals, Sunday dinner, or sliders the next day.
John and I usually serve them with butter, honey, or strawberry jam, but gravy or garlic herb butter are all pretty great choices, too. These rolls are also great with olive oil and balsamic bread dip for a quick appetizer.
Tips for Soft, Fluffy Yeast Rolls
Check the expiration date on the yeast before you begin. Old yeast is one of the most common reasons bread dough doesn’t rise.
This recipe uses rapid-rise yeast, so it can be mixed directly into the flour. There’s no need to dissolve it in the milk first unless you want to make sure it will still activate. In case you need it, I have lots of info on activating yeast.
Be careful not to add too much flour. The dough should be soft and slightly tacky, not firm or dry. Too much flour can leave the finished rolls dense and heavy.
Let the dough tell you when it’s ready. Rising times are only a guide, and a cool kitchen may slow things down.
To check the first rise, flour your fingertip and press it gently into the dough. If the indentation stays, the dough is ready. If it springs back right away, let it rise a little longer.
If your kitchen is cold, place the covered bowl in the turned-off oven with the oven light on. Just remember to remove it before preheating.
How to Make Homemade Yeast Rolls
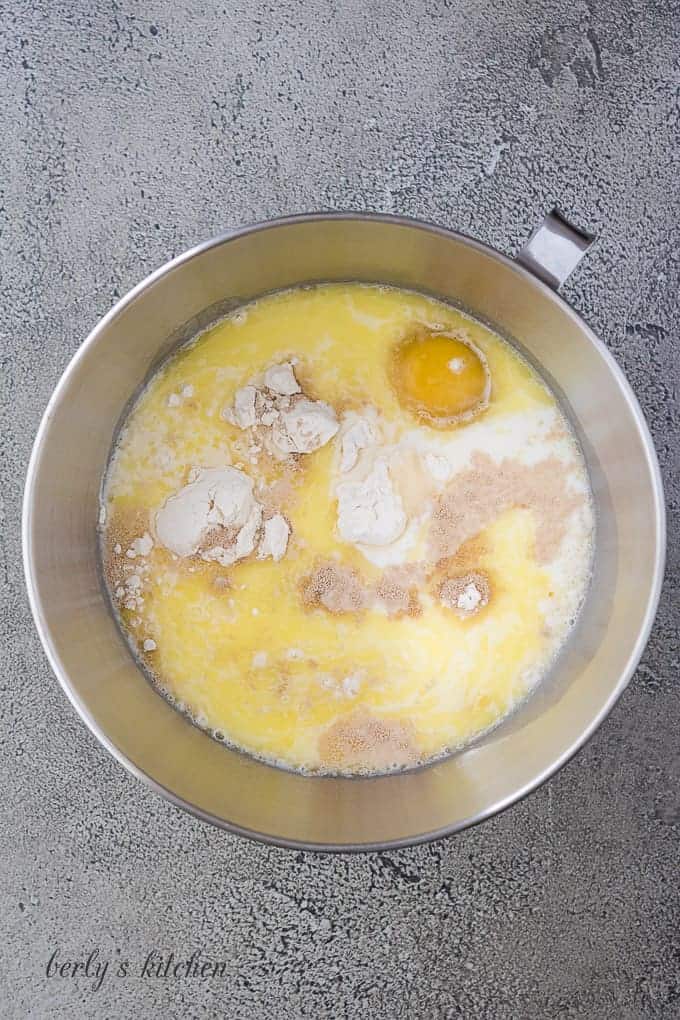
Add 3 cups of flour, the warm milk, yeast, sugar, salt, melted butter, and egg to the bowl of a stand mixer.
The milk should be between 110°F and 115°F. It needs to be warm, but not hot. Let the melted butter cool for a few minutes before adding it as well.
Mix everything with the dough hook on low speed for about 2 minutes. The dough will look rough and sticky at first.
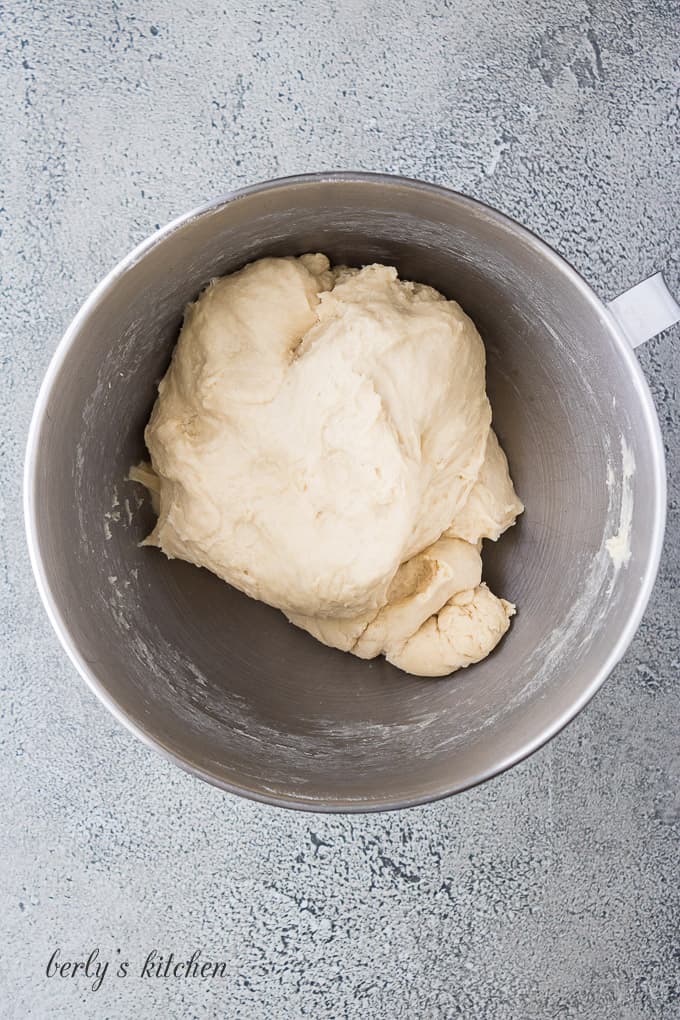
Continue adding flour, about ¼ to ½ cup at a time, until the dough begins to pull away from the sides of the bowl. Scrape down the bowl as needed.
The amount of flour you need may change from one batch to the next. On a humid Florida day, it may take a little more. Stop adding flour when the dough is smooth, stretchy, and slightly tacky.
Continue kneading the dough with the mixer for another 5 to 6 minutes. If it still coats the sides of the bowl or sticks heavily to your fingers, add more flour a tablespoon or two at a time.
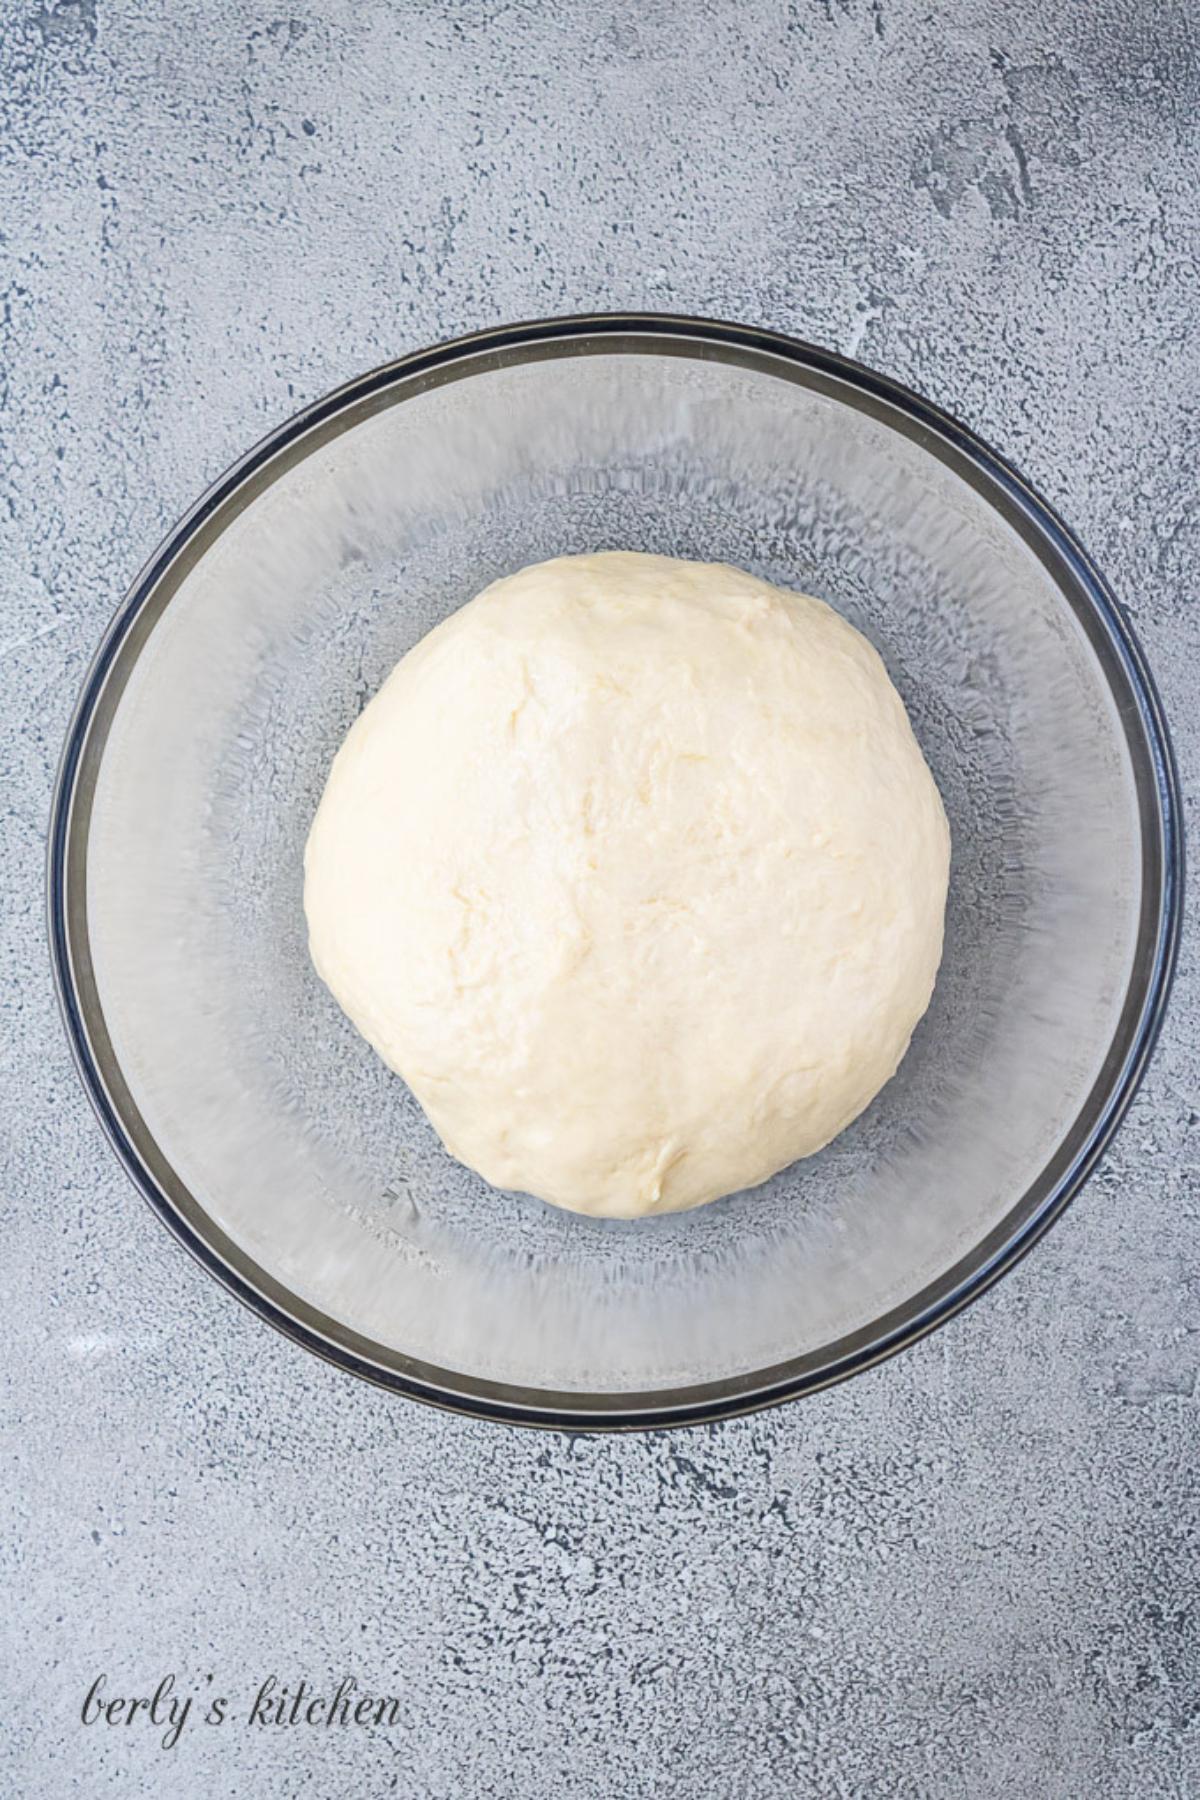
When the dough is ready, it should feel soft and elastic rather than stiff or dry. If you’re using a KitchenAid mixer, keep the dough hook at speed 2.
Shape the dough into a ball and place it in a lightly greased bowl. Cover it with a clean kitchen towel or greased plastic wrap.
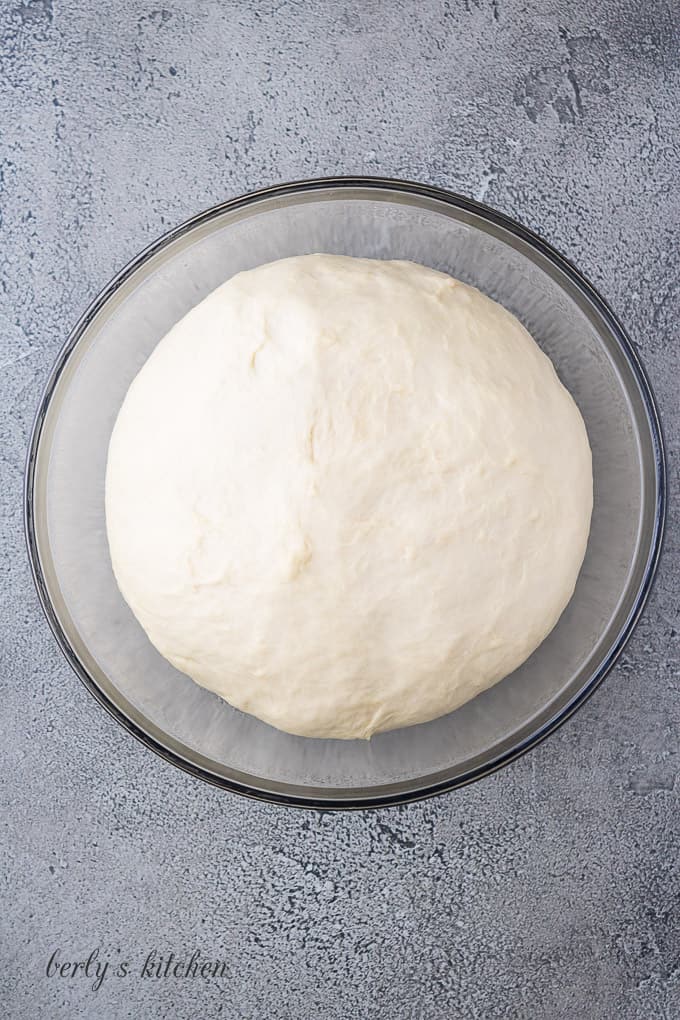
Let the dough rise in a warm, draft-free spot until it has doubled in size. This usually takes 30 minutes to an hour, depending on the temperature of your kitchen.
Don’t worry too much about the exact time. Look at the dough instead. It should be noticeably larger and feel light and airy.
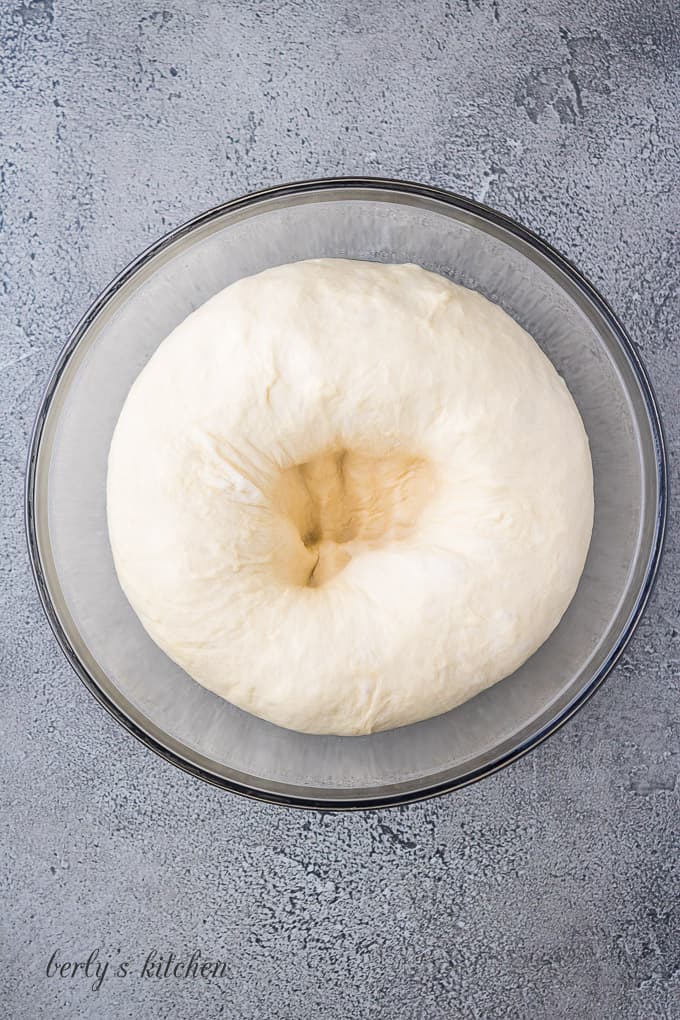
Once the dough has doubled, punch it down and divide it into 24 pieces. A kitchen scale makes it easy to get them close to the same size, but they don’t have to be perfect.
Shape each piece into a smooth ball by pulling the edges underneath and pinching them together at the bottom.
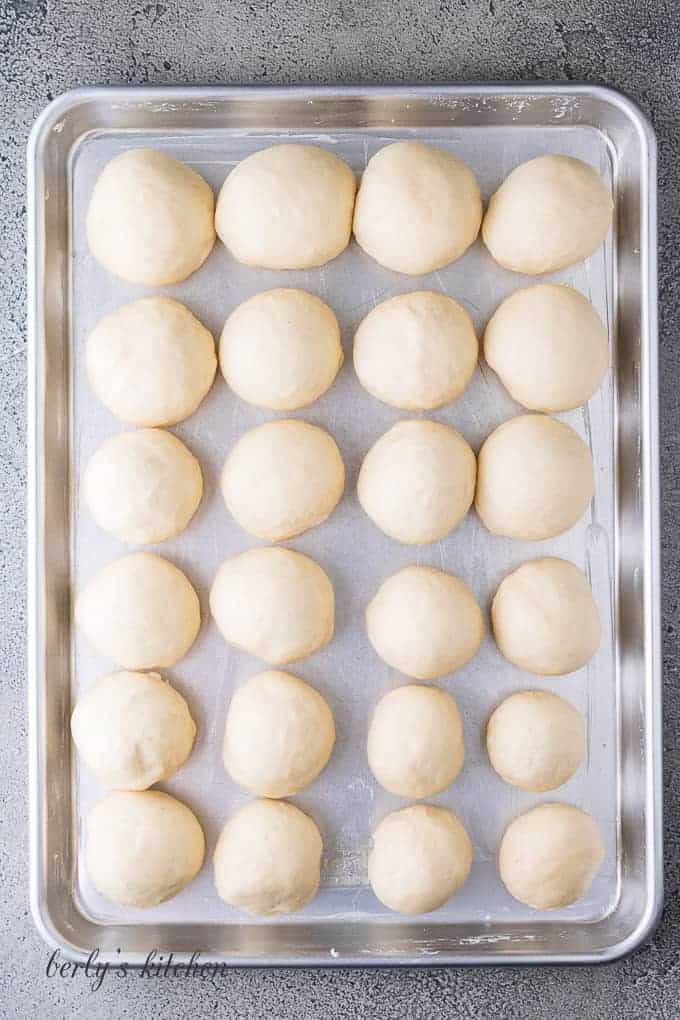
Place the rolls in a greased 9×13-inch baking dish for soft, pull-apart sides. You can also arrange them on a large baking sheet with a little space between each one if you prefer more golden brown edges.
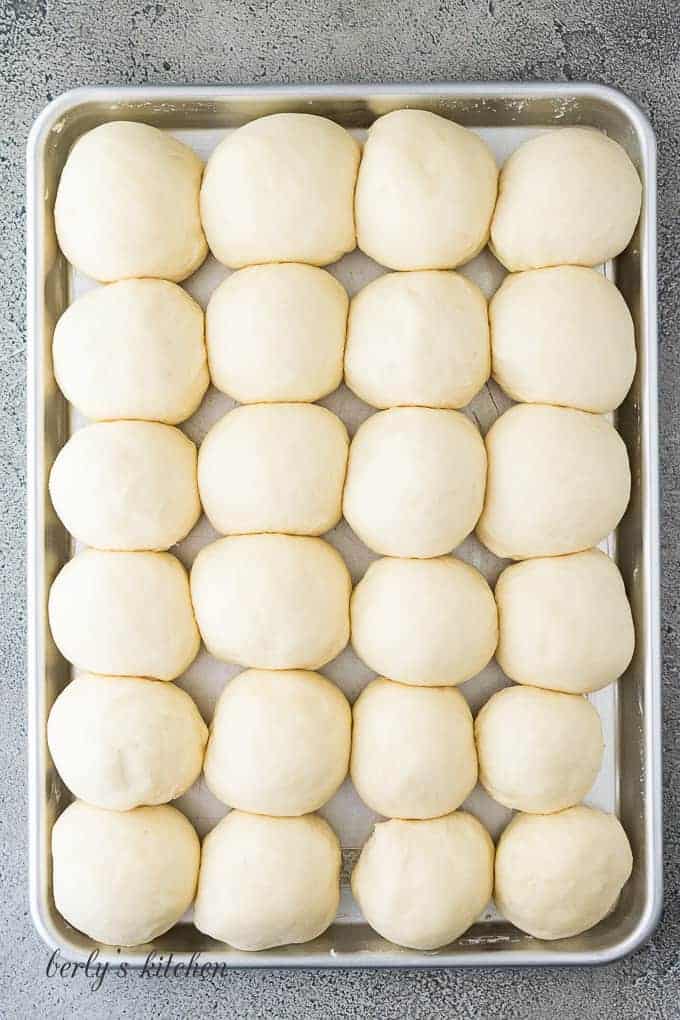
Cover the rolls and let them rise again until they look soft, puffy, and nearly doubled. This usually takes another 30 minutes to an hour.
Preheat the oven to 375°F while they rise.
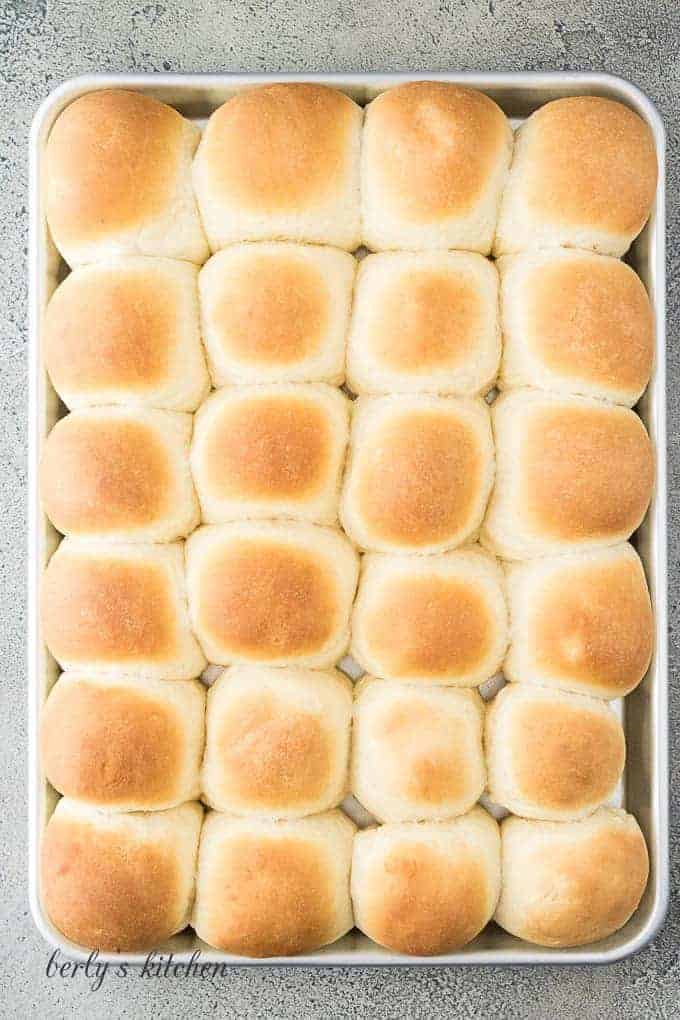
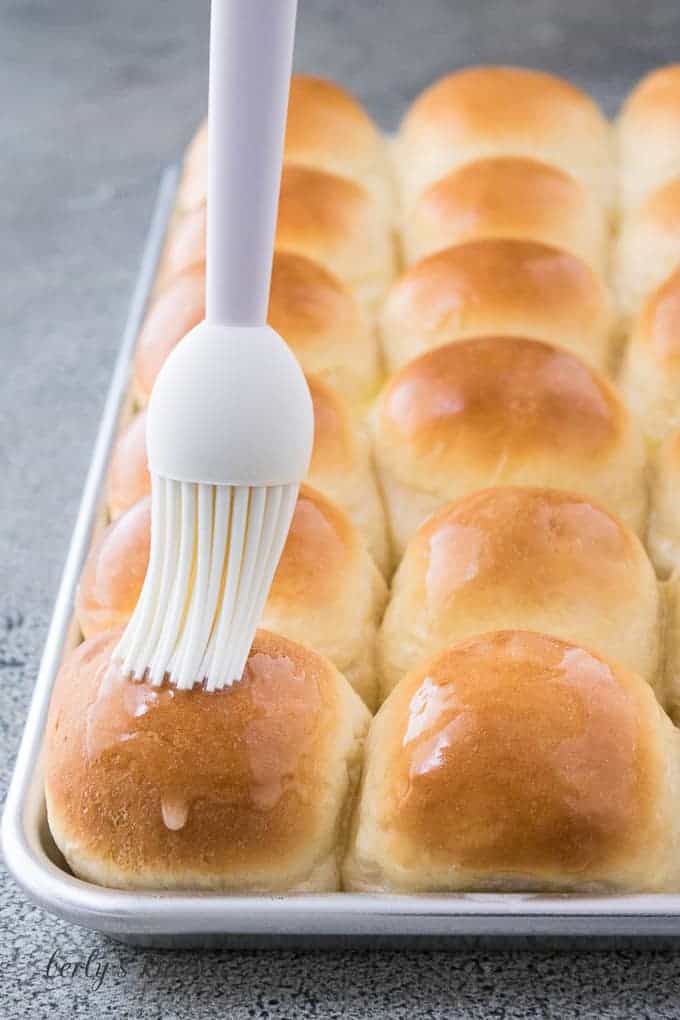
Bake the yeast rolls for 12 to 15 minutes, until the tops are golden brown. Brush them with melted butter as soon as they come out of the oven.
Let them cool for a few minutes, then serve them while they’re still warm.
Storing and Freezing Yeast Rolls
Let the rolls cool completely, then store them in a large zip-top bag or airtight container at room temperature for up to 3 days.
The refrigerator tends to dry bread out, so the counter is the better choice for short-term storage.
Warm one roll in the microwave for about 10 to 15 seconds. To reheat several, wrap them in foil and place them in a 350°F oven for about 10 minutes.
The baked rolls can also be frozen for up to 3 months. Place the cooled rolls in a freezer-safe bag, remove as much air as possible, and thaw them at room temperature before reheating.
What to Serve with Yeast Rolls
These rolls go with just about anything you’d normally serve with bread. Put them on the table with roast turkey, pot roast, or beef tips so there’s something to sop up the gravy.
Since they’re on the smaller side, they also work well for leftover Thanksgiving sliders. For a simple soup dinner, serve them warm with garlic herb butter alongside loaded baked potato soup.
For a richer roll with more butter and egg, try our brioche rolls.
How to Video
Ingredients
- 4 ½ to 5 ½ cups all-purpose flour
- 1 ½ cups milk, warmed to 110°F to 115°F
- 2 tablespoons rapid-rise yeast
- ¼ cup granulated sugar
- 1 teaspoon salt
- 4 tablespoons unsalted butter, melted and slightly cooled
- 1 large egg
- Melted butter, for brushing
💌 Don't forget to save this recipe!
Instructions
- Add 3 cups of the flour, the warm milk, yeast, sugar, salt, melted butter, and egg to the bowl of a stand mixer.1 ½ cups milk2 tablespoons rapid-rise yeast¼ cup granulated sugar1 teaspoon salt4 tablespoons unsalted butter1 large egg
- Using the dough hook, mix on low speed for about 2 minutes, until the ingredients begin to come together.
- Add the remaining flour ¼ to ½ cup at a time, mixing after each addition, until the dough begins to pull away from the sides of the bowl. Scrape down the bowl as needed.
- Continue kneading with the dough hook on low speed for 5 to 6 minutes. If using a KitchenAid mixer, use speed 2. Add more flour a tablespoon or two at a time as needed. The finished dough should be smooth, elastic, and slightly tacky, but not wet or sticky.
- Shape the dough into a smooth ball and transfer it to a large, lightly greased bowl. Cover with a clean kitchen towel or greased plastic wrap.
- Let the dough rise in a warm, draft-free spot until doubled in size, about 30 minutes to 1 hour.
- Punch down the dough, then divide it into 24 equal pieces. Shape each piece into a smooth ball.
- Arrange the rolls in a greased 9×13-inch baking dish for soft, pull-apart sides. For more golden brown edges, place them on a large rimmed baking sheet with a little space between each roll.
- Cover the rolls and let them rise until puffy and nearly doubled, about 30 minutes to 1 hour. Preheat the oven to 375°F while they rise.
- Bake for 12 to 15 minutes, until the tops are golden brown.
- Brush the warm rolls with melted butter and serve.
Notes
- The amount of flour needed may vary depending on humidity and how the flour is measured. Stop adding flour when the dough is soft, elastic, and slightly tacky.
- Rising times are estimates. A warm kitchen may speed up the process, while a cooler kitchen may require more time.
- Store cooled rolls in a large zip-top bag or airtight container at room temperature for up to 3 days.
- Freeze the cooled rolls in a freezer-safe bag for up to 3 months. Thaw at room temperature before reheating.
- The nutrition information is an estimate based on two rolls and does not include the additional butter used for brushing.
- Looking for our dinner rolls recipe from More Than Meat and Potatoes? We’ve moved it to our Retired Recipes page!
I make these every year for Thanksgiving and they are always a hit! I’m wondering if you could freeze the dough before baking and then thaw the dough and bake? Thank you!
Hi Rebekah!
We’re so glad to hear that these are a Thanksgiving favorite! 😁 I haven’t tried to freeze this particular recipe, but I’m thinking it would work. You’d need to make the dough, shape the rolls, and place them on a baking sheet to freeze for about an hour or so. Transfer them to a freezer-safe container or plastic bag.
When you’re ready to bake the rolls, place them on the sheet pan or in the baking pan and let them rise at room temperature until the they double in size and get puffy. Then bake like normal. If you have time, consider doing a trial run before Thanksgiving as a test.
Hope this helps and that you have a wonderful Thanksgiving! 😊
They look delicious. I am about to start making these. Could I use bread flour instead of regular? I have some on hand is why I ask. Will let you know the results.
Good morning Joyce, yes, you can use bread flour. In fact, I did so recently. For that version, I substituted approximately 2 cups of bread flour in place of the all purpose flour. Now, I still used about 2-3 cups of all purpose flour (to get the total amount of flour). So it was more a blended flour mixture. However, the rolls turned out great. They were softer and chewier than the regular recipe. Please let us know how yours turned out. Thank you for commenting and have a lovely day 🙂
Hello! Can you knead this by hand if you don’t have a stand mixer? I want to make these over the holidays, but where I am going there isn’t a stand mixer. Thanks so much!
Hi Jennifer!
Absolutely! The dough can be kneaded by hand. It usually takes about 8-10 minutes. The dough should be smooth, elastic, and just barely tacky but not stick to your hands or fingers. Have a wonderful weekend! 🙂
Hi there,
I was wondering if I can use fresh yeast (refrigerated)? And if so do you know what the equivalent would be?
Hi Meri!
We haven’t tried fresh yeast with this recipe, but I think it should work fine. Normally, it doesn’t take nearly as much fresh yeast as it does dry, so try 1 1/2 to 2 teaspoons to start. I’m thinking that should be sufficient. We’d love to know how it works out. Have a wonderful week! 🙂
Hey there
Can I use regular active yeast instead of rapid rise. ( geez I hope this isn’t a dumb question 🤦🏽♀️)
Cheers, Heather🎄
Good Afternoon Heather, that’s not a dumb question. Sure, you can use regular active yeast in place of the rapid rise. However, it may take longer for the rolls to complete their rise(s). I hope this information helps and we wish you a lovely day. 🙂
Can you convert this recipe into 12 rolls instead of 24 by cutting the recipe in half or do you have to adjust it differently? Thanks for your response.
Good Morning Tanya, that’s a good question. You can try cutting it in half or simply making larger rolls (12 large rolls instead of 24). We’ve never halved the recipe, so I would go slow and make sure the dough isn’t too dry or too sticky. Pay close attention to the process photos as references. Other than that, I don’t foresee any issues. Let us know how it turns out. Have a lovely day 🙂