Cinnamon Rolls
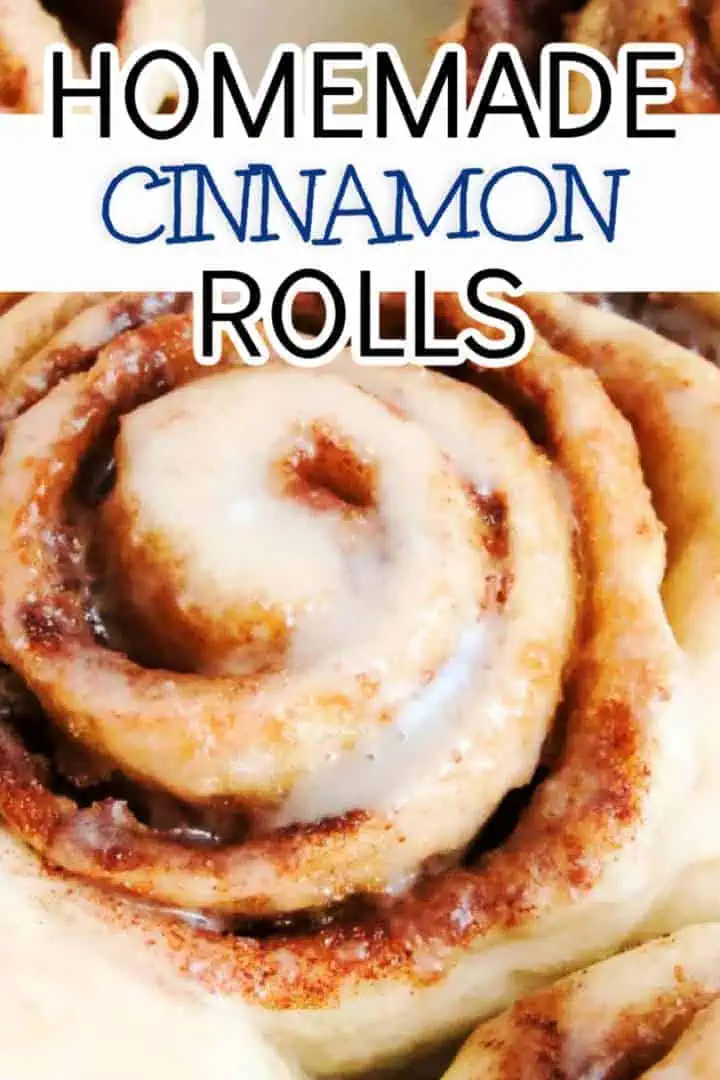
Make the best homemade cinnamon rolls with this easy, family-favorite recipe. Soft, fluffy, and topped with luscious icing, these cinnamon rolls are perfect for any breakfast or brunch.
There’s something magical about the smell of freshly baked cinnamon rolls wafting through the house, isn’t there?
This recipe has been a beloved staple in my family for over 10 years, bringing warm, gooey goodness to countless breakfasts and brunches.
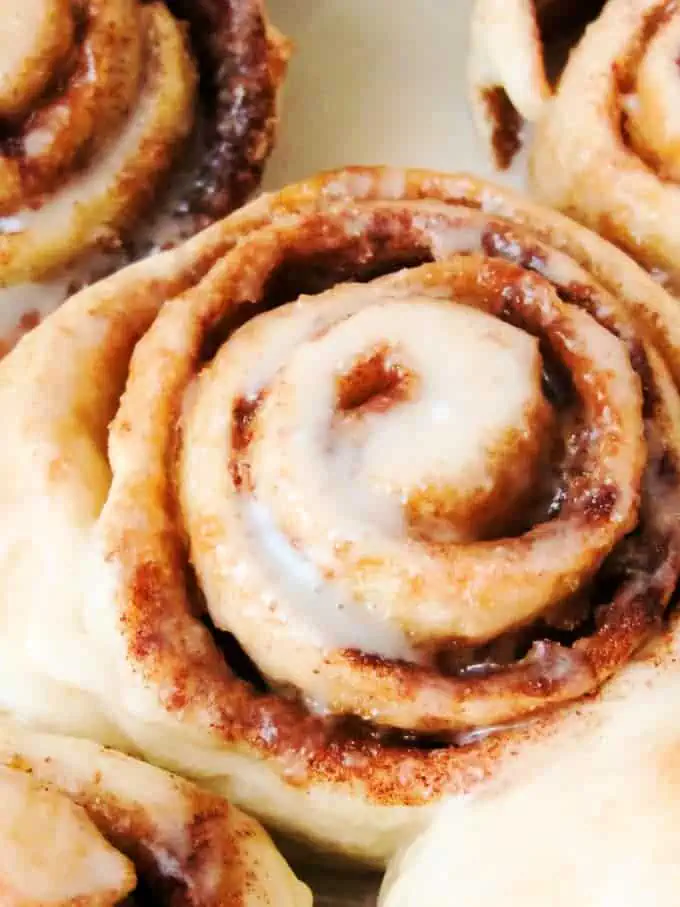
The combination of soft, fluffy dough, swirled with a generous layer of cinnamon and sugar, and topped with a luscious icing, makes these rolls absolutely irresistible.
I’ve made these homemade cinnamon rolls so many times that I could probably bake them with my eyes closed!
They’re a family favorite, and I’m excited to share this tried-and-true recipe with you.
Whether you’re an experienced baker or a newbie in the kitchen, you’ll find that these homemade cinnamon rolls are not only delicious but also fun and satisfying to make.
Looking for other breakfast recipes to try. Check out our Buttermilk Pancakes or Cinnamon Bread. Short on time? These sticky buns use frozen Rhodes cinnamon rolls and a quick pecan caramel topping.
Tips for Perfect Cinnamon Rolls
Tips
Proper Dough Consistency: When mixing the dough, add flour gradually. The dough should be soft and slightly sticky but not overly wet.
Cutting the Rolls: For the perfect slice, use dental floss to cut the rolled dough. Slide the floss under the roll, cross it over the top, and pull tight. Or, try the pizza cutter method that I used for our carrot cake cinnamon rolls.
Baking: Keep an eye on your rolls towards the end of the baking time. Bake until they are golden brown, usually 20 to 30 minutes. Overbaking can dry them out, so it’s better to check a little earlier.
Icing: Spread the vanilla icing on the rolls while they are still slightly warm. This allows it to melt a bit and seep into the rolls, adding extra moisture and sweetness.

Storage and Reheating
Storage: Finished cinnamon rolls will last in an airtight container in the fridge for 3-4 days. You can also leave them unfrosted and store them at room temperature for 2-3 days.
Freezing: Cinnamon rolls can be frozen, but I recommend doing so without the icing. To freeze the rolls, let them cool completely, wrap them tightly in a couple layers of plastic wrap followed by a layer of aluminum foil, then store them for up to 1 month.
Reheating: To warm your cinnamon rolls, let them thaw fully in the fridge if frozen, then warm either in the microwave or oven and add the icing before serving!
FAQs (Frequently Asked Questions)
Other Great Breakfast Recipes to Try
Looking for more delicious breakfast ideas? Check out more of our favorite recipes:
- Bisquick Breakfast Casserole
- Farmer’s Casserole
- Sticky Buns with Rhodes Cinnamon Rolls
- Crescent Roll Breakfast Casserole
- Croissant French Toast Bake
- Overnight Blueberry French Toast Casserole
More Cinnamon Roll Recipes to Try
- Caramel Apple Cinnamon Rolls
- Puff Pastry Cinnamon Rolls
- Cinnamon Rolls with Heavy Cream
- Air Fryer Cinnamon Rolls
How to Video
Ingredients
For the Cinnamon Roll Dough:
- 2 ½ to 3 ½ cups all-purpose flour
- 3 tablespoons granulated sugar
- 2 ¼ teaspoons instant yeast, 1 standard packet
- 1 teaspoon salt
- ½ cup water
- ¼ cup whole milk
- 3 tablespoons unsalted butter, softened
- 1 large egg, lightly beaten (at room temperature)
For the Filling:
- 3 tablespoons unsalted butter, softened
- ½ cup light brown sugar, packed (or more to taste)
- 2 to 3 tablespoons ground cinnamon, adjust to taste
For the Glaze:
- 1 cup powdered sugar
- 2 to 3 tablespoons whole milk, adjust to desired consistency
- 1 teaspoon vanilla extract
💌 Don't forget to save this recipe!
Instructions
Prepare the Dough:
- Lightly grease a 9×13-inch baking dish and set aside.
- In the bowl of a stand mixer, combine 2 ½ cups of flour, granulated sugar, yeast, and salt.2 ½ to 3 ½ cups all-purpose flour3 tablespoons granulated sugar2 ¼ teaspoons instant yeast1 teaspoon salt
- In a microwave-safe bowl or over the stovetop, heat the water, milk, and 3 tablespoons of butter until it reaches 110°F to 115°F.½ cup water¼ cup whole milk3 tablespoons unsalted butter
- Pour the warm water mixture into the dry ingredients in the stand mixer. Add the beaten egg.1 large egg
- Using a dough hook, mix on low speed until the dough starts to come together. If the dough is too wet, gradually add more flour, 1 tablespoon at a time, until a soft, smooth, and elastic dough forms.
- Continue to mix on medium-low speed for 5-6 minutes. Allow the dough to rest in the bowl for 3-5 minutes.
Roll Out the Dough:
- Turn the rested dough out onto a lightly floured surface. Use a rolling pin to roll it into a rectangular shape, about ¼-inch to ½-inch thick.
Add the Filling:
- Spread the softened butter evenly over the rolled-out dough.3 tablespoons unsalted butter
- Sprinkle the brown sugar and cinnamon evenly over the buttered surface.½ cup light brown sugar2 to 3 tablespoons ground cinnamon
Shape the Rolls:
- Starting from the long side, tightly roll the dough into a log, keeping the filling inside.
- Use a sharp knife or dental floss to cut the rolled dough into 12 equal pieces.
Rise:
- Arrange the cut rolls in the prepared baking dish. Cover with a clean towel and place in a warm, draft-free area to rise until doubled in size, about 1-2 hours.
- Preheat your oven to 350°F during the last 15 minutes of rising.
Bake:
- Bake the rolls in the preheated oven for 20-30 minutes or until they are golden brown.
- Remove from the oven and let the rolls cool slightly before adding the glaze.
Make the Glaze:
- In a small bowl, whisk together powdered sugar, 2 tablespoons of milk, and vanilla. Adjust the consistency with more milk if needed.1 cup powdered sugar2 to 3 tablespoons whole milk1 teaspoon vanilla extract
- Spread the glaze over the slightly warm rolls and enjoy!
Notes
- Environmental factors cause the amount of flour required to vary slightly by region. We’ve linked to a great resource in the FAQs section of the post.
- We have not tried to substitute ingredients such as gluten-free flour, bread flour, almond milk, soy milk, etc. and cannot provide recommendations on the use of alternate ingredients.
- The calories listed are an approximation based on the ingredients in the recipe card and a serving size of 1 cinnamon roll. Actual calories will vary.
- For more glaze, make a double batch.
Very easy. wonderful aroma while baking reminded me as a child while Mom making them. Soft, fluffy and taste wonderful.
Delicious! Very happy with this recipe. My mixer couldn’t handle the dough so I had to knees by hand. Still turned out great and I got a quick arm workout! 😂
Thank you DeDe, we’re thrilled you enjoyed the cinnamon rolls and got an arm workout as well lol! Have a lovely day 🙂
Does any ingredients have to be at room temperature?
Hi Kelsey!
The butter needs to be softened and the milk and water should be warmed. That’s listed in the recipe, so as long as you follow it, you should be good! I always use an egg right out of the fridge. It would work fine at room temperature, too. Although, it’s not necessary. Hope that helps! 🙂
These are perfect! 😋
I followed the recipe with active yeast, I don’t have a stand mixer so I used my bread machine for mixing and kneading then let it rest 5 minutes rolled out, added filling rolled up and cut into rolls.
My house is cold so I placed plastic wrap (sprayed with Pam) on the top and placed in my microwave and prompt the door with the end of a spoon so the light would stay on, (that’s how I get my breads to rise)🤷🏻♀️ I set my timer for 1 hour to rise then baked at 350’ for 25 minutes let cool and topped with icing.
I love baking breads (I’m not that good at it yet) and I never uses my bread machine I don’t like the breads I’ve baked in it, this was my first time to use it for mixing and kneading and it worked! 😉
Hi Carol!
Thanks so much for the comment! I love your workaround for proofing dough in the microwave. That’s a great tip!
I use our new bread maker more for kneading than actually making bread. Lol! It comes in handy. We’re so happy the cinnamon rolls turned out and that you enjoyed them. Have a wonderful evening! 🙂
Hi Carol. If you set your oven at 350f for 3 minutes and then turn it off it will be the perfect temp for proofing any dough. I have been using it for years. Nice and cozy and no draft. A plus is that you can see when they are ready without opening the door.
I just wanted to say they are so easy to make and that is alot I am terrifed of yeast dough but I did activate it separately and worked wonderfully also I let them raise on the stove my family loved them they were gone by the next day been requested to please make more I would recommend this recipe to anyone !
Hi Shirley!
We are so happy to hear that, and thrilled that your family enjoyed the cinnamon rolls! 🙂 Thank you so much for coming back to comment. We hope you have a wonderful week!
HI there – Can I let the cinnamon roles sit for awhile before they bake? Am planning on making these before going over to a friend’s house to bake, but don’t want them to over-proof and mess them up!
Hi Terri!
That’s a great question! I wouldn’t leave them too long; otherwise, you do run the risk of them overproofing. An extra 20-30 minutes probably wouldn’t hurt, but I wouldn’t leave them much longer. 🙂
Hi can you tell me how to replace active or dry yeast with a starter? I have a sour dough starter I’d like to use when baking these cinnamon rolls.
Good Morning Sandy, that’s a great question. Kim and I chatted and we both came to the same conclusion. Unfortunately, we’re not sure if that’s possible with our recipe. So, I have provided 2 links to 2 different sites with sourdough cinnamon roll recipes. I hope this information helps and we wish you a lovely day 🙂
https://www.theclevercarrot.com/2017/12/how-to-make-sourdough-cinnamon-rolls-step-by-step-guide/
https://www.kingarthurflour.com/recipes/sourdough-cinnamon-buns-recipe
Thank you for sharing this recipe. My family has been extremely pleased with the results every time, and wait the next batch on edge! I have been happy to serve them this greatness thanks to this post! Great recipe, and I will look into your others. Keeping sweet hunters happy!
Hello, I am wondering if there’s a way to make these using a hand mixer. I don’t have a stand mixer and I know they are expensive… what did they do in the days before stand mixers? Lol!
Good question, Joanna! I asked Kim and she said you can use a hand mixer. With that being said, you will still need to use a dough hook and a good motor (on your hand mixer) for the kneading part. If you’re concerned about burning out your mixer on the kneading step, just use your hands to knead the dough. I hope this information helps and we wish you a lovely day 🙂
Hi!!!!
The best recipe that I’ve tried! Fluffy, thick and sooo delicious! Thank you for the recipe.
Lory
Got a new stand mixer this weekend. Never made cinnamon rolls before, so this was my first try. These came out wonderful. Thank you for making my first experience a wonderful one.
First time making cinnamon rolls and this easy recipe did not disappoint. Thanks for sharing
Are these really supposed to have that much cinnamon in them? I ended up using about 2.5 tablespoons because I ran out and I’m happy I didn’t do the full 4-5 because my kids were complaining that the rolls burn their tongues. I liked them, but they were definitely VERY cinnamon-y. And I did do the full 1/2 cup brown sugar, so it probably would have been even more overwhelming with only 1/4 cup.
Hi Claire! Yes, these cinnamon rolls are supposed to have a lot of cinnamon. Our family likes a lot of cinnamon flavor and less of a bready dessert. Please use the amount of seasonings (cinnamon, sugar, etc.) in the recipe as a guideline, but adjust as needed. Some people prefer differing amounts of flavors, so definitely make it with your family in mind. 🙂
Thank you so much! These were really delicious even with a lot of cinnamon (I’ll try less next time though). So delicious I made a second batch with strawberry jam in them the same night. Thanks for sharing!
Hi, thought I would share my make the night before steps with everyone who likes sleeping in in the mornings as I do.
Placing my rolls in a greased glass baking dish/pan I then cover with lint free dish towel, set on upper rack in my oven and then place a large pan of very hot tap water in the bottom of my oven and shut the door. In 20 to 30 minutes my rolls have risen more than twice their sizes (which is ok cause they shrink a bit in the fridge over night) I wrap my rolls in the pan tightly with plastic wrap forcing any and all air pockets out, working in sections from one end to the other till fully sealed. I place in fridge till morning when I then take them out and do the oven, pan of hot water trick to get them room temp and let them rise back up. I then bake as directed adding 3 to 5 minutes more since the centers are cooler when starting.
I usually can have the rolls done within an hour from the moment my kids force me out my bed.
Hope this helps other non-morning people out their.
Did I miss the rise instructions in the reciepe? It just said to mix the dough, roll it out and put it in the oven! The dough needs time to rise
Good Morning, Amber, yes you did miss something. On the recipe card, right under the “Rise” section, it explains to place the cinnamon rolls in a warm, draft-free place and allow to rise until doubled in size. It’s the first instruction under the “Rise” section, so I’m not sure how that went unseen. However, I went ahead and verified everything is correct on the recipe card. Have a great day.
I’m making them this weekend *so excited* and Inwas just wondering to roll them, would you have the long side of the rectangle parallel with the counter edge and then roll them up?
Thank you for your question Meliena. Yes, you’re correct, when rolling the cinnamon rolls, you will want to roll the long side of the rectangle up and not the short side. Otherwise, you won’t get many cinnamon rolls and they’ll be too thick to cook properly with the oven temp and time listed in the recipe. If you have any other questions, feel free to reach out to us again. You can either leave another comment or email us. Have a lovely day, Meliena!
Very good and easy recipe. I have been wanting to try a cinnamon roll recipe and picked this one. The directions are easy to follow and they make a delicious roll. I love a lot of cinnamon so I used Saigon cinnamon 4 1/2 Tablespoons in mine.
Thank you Lora! I too enjoy the flavor of cinnamon. I’ve never tried Saigon cinnamon before, I’ll give it a shot. Maybe in oatmeal or something like that to start. Kim and I are happy you like the recipe and found the directions easy to follow. Thank you again for coming back to comment on and rate the recipe card. Have a lovely Sunday, Lora 🙂
Just made these, they taste amazing! The dough was so easy to work with. I was able to get fifteen nice size buns. Will definitely make them again.
Just did this for the first time and I was amazed by the result. It’s totally awesome. Thanks for sharing your easy and delicous recipe. ????????????????
I love these rolls they turned out great and were so easy to make. My husband loved them, thank you!
How long do they hae to rise?Can i make the dough the night before, then bake them the next morning?
Hi, Jenna! The dough needs to rise until it doubles in size. The time it takes can vary depending on how warm of an area you place the dough in to rise. Usually, ours takes about an hour. Yes, you can make the dough the night before and bake them the next morning. For the best practices on how to do this, please see this article from King Arthur Flour.
Can I make the dough the night before and bake them the next day?
Thanks —
Hi, Melisa! Yes, you absolutely can. There is a link to King Arthur Flour’s site earlier in the comments that explains the best way to do it. Happy Holidays!
I made these and followed the recipe. I thought it was odd for only 3 tablespoons sugar as I’ve always used more, but the comments said theirs all tasted good and I’m all for good tasting and less sugar. But sadly mine came out tasting like flour 🙁 I followed the recipe exactly so I don’t know what happened. They are definitely fluffy and I think next time I’ll add more sugar cuz these do look amazing!!!
Hi Paige! Thanks so much for your comment. We’re glad you tried the cinnamon rolls and sorry they didn’t turn out. I double checked the recipe to make sure it wasn’t missing anything. The dough calls for 3 tablespoons of granulated sugar and the filling calls for 1/4 cup to 1/2 cup of brown sugar in addition to the cinnamon and butter. Please feel free to add more to your taste. 🙂 We’d love to know how they turn out next time. Thanks again and enjoy the rest of your weekend!
Trying these today! I’ve been looking for a good homemade cinnamon roll recipe and this one sounds perfect!
Hi,
I’ve decided to try your recipe, but don’t have a cooking thermometer. Is it possible to know if the butter, milk, and water have reached 115 degrees using another method?
Thank you!
Hi Veronica! No worries. We don’t have a thermometer either. It broke a while back. My best advice is to test the liquid with your finger (it sounds silly, but it works). It should be slightly warm but not hot (no steam or bubbles). If it burns you, then it will be too hot for the yeast. My husband put it best when he said, it’s similar to heating up a baby’s bottle. I also highly recommend that you check the expiration date on the yeast prior to beginning, just to make sure it’s not expired. 🙂 If you’d like more tips, please check out the comment section in this recipe. My husband explained in depth how to work with yeast. It may be of some help. Please let us know if you have any other questions!
Thank you for your advice! It turned out pretty well I think! As I am new to using yeast and taking on some harder baking recipes, I think I will get better over time. Thanks again for your help!
Thanks for letting us know how they turned out. 🙂 Working with yeast takes practice, but keep at it. It gets a lot easier with time. Have a great day!
hola. culsulta. zucar granulada seria azucar comun? y si uso levadura fresca que cantidad necesito? muchas gracias
Hola, Estefi. Estoy usando Google translate. Espero que esto tenga sentido. El azúcar granulada funcionará, pero el sabor será ligeramente diferente. El azúcar moreno contiene melaza y una textura diferente a la del azúcar blanco granulado. Para el relleno, use la misma cantidad de azúcar granulada que el azúcar moreno. Para la levadura, activarla antes de añadirla a los demás ingredientes. Coloque la levadura en 1/2 taza de agua tibia (de las instrucciones no añadir más) hasta que se vuelve de color marrón claro y espumoso a continuación, agregue a los otros ingredientes según las instrucciones. ¡Gracias por sus preguntas! Por favor, hágamelo saber si tiene preguntas adicionales. 🙂
My did not rise. I did do the step 2 method
Hi, Di! I’m sorry to hear the dough didn’t rise. Just a quick question, where you using active yeast? If not, that may be the issue. If so, you may find the information regarding yeast in the comment section of our brioche buns post helpful. Please let us know if you decide to give them another try and have any questions. 🙂
I used active dry yeast and just mixed it with the flour sugar and salt as is.. are they still going to come out ok?
Hi, Monica! That’s exactly how I make them, so they should work wonderfully. 🙂 If they don’t for some reason, don’t get discouraged. Please let us know and we’ll try to help you figure out how to make them work.
So I have probably a dumb question for y’all experienced bakers lol. But I’m just getting my feet wet in the kitchen. And when you say add the yeast to mixture, do you just open the package of yeast and pour the little seed like things directly into the mix or do you dissolve it first and if so with how much water? I really want to make these tho. Just don’t always comprehend all the kitchen lingo.
Thanks,
Jillian
Hi, Jillian! That’s not a dumb question at all. I’m glad you asked ahead of time and will update the recipe accordingly in case someone else wonders the same thing. 🙂 There are a couple of different ways to work with the yeast. This particular recipe works by adding the dry (active yeast) straight from the packet right into the flour and other ingredients. I use Fleischmann’s Active Yeast. However, if you don’t have active yeast, it should be activated ahead of time. In regards to the liquid for activating the yeast, use either the water or the milk already listed in the ingredients. Don’t add any additional liquid. Here’s a link to another post where my husband answered a yeast activation question earlier today. Hopefully, it will be helpful, too. https://www.berlyskitchen.com/brioche-buns/ Just a side note here, start off with less flour and add more as needed a tablespoon at a time. If you don’t need the full amount, don’t use it. 🙂 Weather, humidity, altitude and air temperature all play huge roles in baking. The exact amounts I use may not work for you. Please let us know if you have any more questions.
I was really disappointed in these. Before adding the tablespoons of flour my dough was already very stiff and hadrd to work with. It was much too stiff to roll so I ended up throwing it out. 🙁
Hi Dana! I’m so sorry the cinnamon rolls didn’t work out. If you decide to try them again, I’d like to offer a couple tips. Start off with less flour, maybe 1 1/2 to 2 cups. Only add additional flour if needed. The end result should be a smooth, elastic dough. Also, scoop the flour into the measuring cup with a spoon then level it off with a knife, that way there’s not excess flour packed into the measuring cup. One more thing to consider, the weather can play a role in baking. If the air is dry, it will suck the moisture out of the dough. You’ll definitely want to start with less flour. Hopefully, this helps some. 🙂
I want to try these for Christmas morning. How long does it take for the dough to rise, per step #14.
Hi, Beth! If you put the dough in a really warm area, it may only take about 30 minutes. If you place the dough in a room temperature area, it could take 30 minutes to an hour. Using rapid rise yeast makes it rise faster, too. 🙂 Sometimes I will preheat my oven to the very lowest temperature (170 degrees), then turn it off. Next, I place the rolls in the oven to rise and crack the oven door. Just make sure the oven is turned off and don’t leave the rolls in too long, otherwise, they will dry out. Thanks for your question!
Hello I’m new to this, how do I know when to pull them out is there a time frame (20min?) Or should they be so tall?
Hey, Melissa! It takes around 25 minutes in our oven, but every oven cooks a little differently. The cinnamon rolls should turn a light to medium golden brown color then they can be removed from the oven. Sometimes they do bake up fairly tall. The weather, altitude, pan, oven, etc. all play a huge role in how these turn out from person to person.
These look awesome! Can I make these as refrigerate over night and Bake in the morning?
Hi, Kat! I haven’t tried to refrigerate them, so I don’t want to tell you wrong. However, here’s a great post that explains how to freeze cinnamon rolls and bake them. http://blog.kingarthurflour.com/2010/12/10/freeze-cinnamon-buns-in-20-minutes/ Maybe it can be of some help. Thanks for stopping by and for the comment!
This recipe it’s AMAZING, I did this today and my whole family loved it. The best cinnamon rolls I’ve ever tried. Thank you! Greetings from Chile. (Sorry if my english wasn’t correct!)
Awesome recipe!! Thank you for sharing! I was just wondering was the temp for the milk and butter is it 115 Fahrenheit or in Celsius?
Hi, Fan! It’s 115 Fahrenheit. Thank you for your comment and for stopping by. 🙂
Is it possible to do this by hand? I dont have a stand mixer.
Hi, Tonia. Absolutely! Go ahead and mix the ingredients as instructed but instead of using a stand mixer, knead the dough with your hands like you would bread dough. You’ll have to knead it for about 8-10 minutes until it’s smooth and elastic.
At what stage could I refrigerate or freeze these delicious rolls?
Hi Maris! I refrigerate our leftover cinnamon rolls and reheat them in the microwave for 15 seconds. That makes them wonderfully warm and gooey! I’ve never frozen or refrigerated the dough during the preparation process, but here’s a great article that explains exactly how to do it. I hope you find it helpful! FREEZE:Cinnamon Buns in 20 Minutes
Just made these with my four year old daughter. They really are pretty easy and quick! I used a flour blend instead of pure white flower and they turned out great! We haven’t even put the icing on yet and they are delicious! Thanks for the recipe! ?